
How to Setup your TP-Link EC230-G1 Fibre Router
Once your Fibre ONT has been installed, it’s quick and easy to get your TP-Link EC230-G1 Fibre Router connected.
We’ve dividedTP-Link EC230-G1 Fibre Router our setup guide into 4 different sections, depending on your experience level you can skip ahead to the one you need, or start right from the beginning.
•Unboxing and Router Info
•Plugging in and Connecting to your Router
•Quick Setup Guide
Unboxing and Router Info
Follow these steps to familiarize yourself with your new router:
-
Unboxing your Router
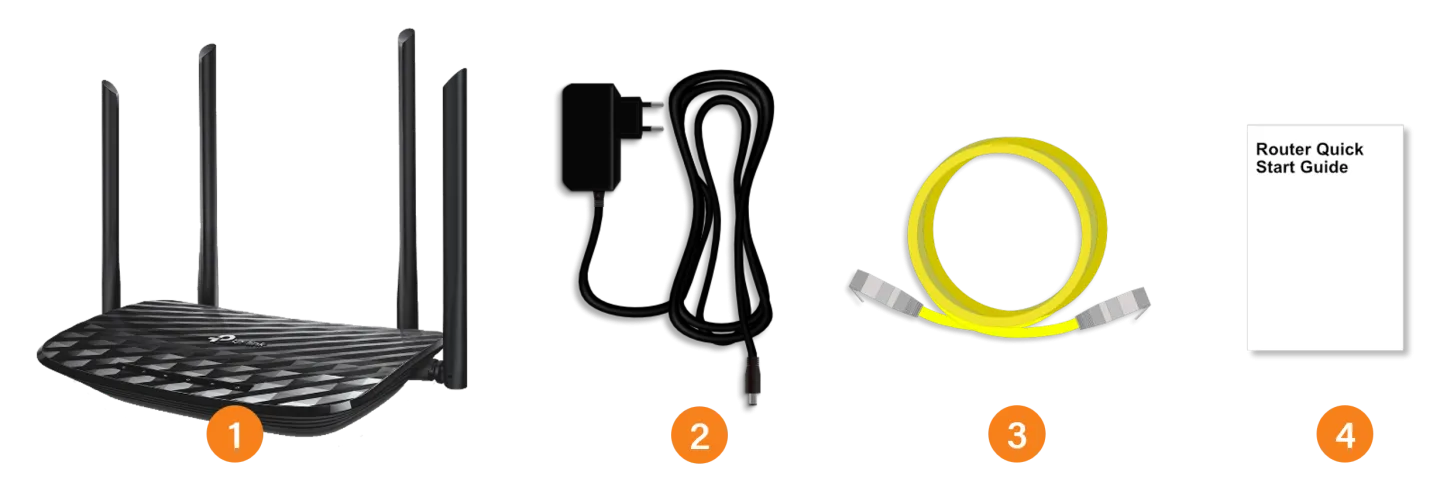
In the Box you will find:
- TP-Link EC230-G1 Fibre Router
- Power supply
- Ethernet cable
- Quick start guide
-
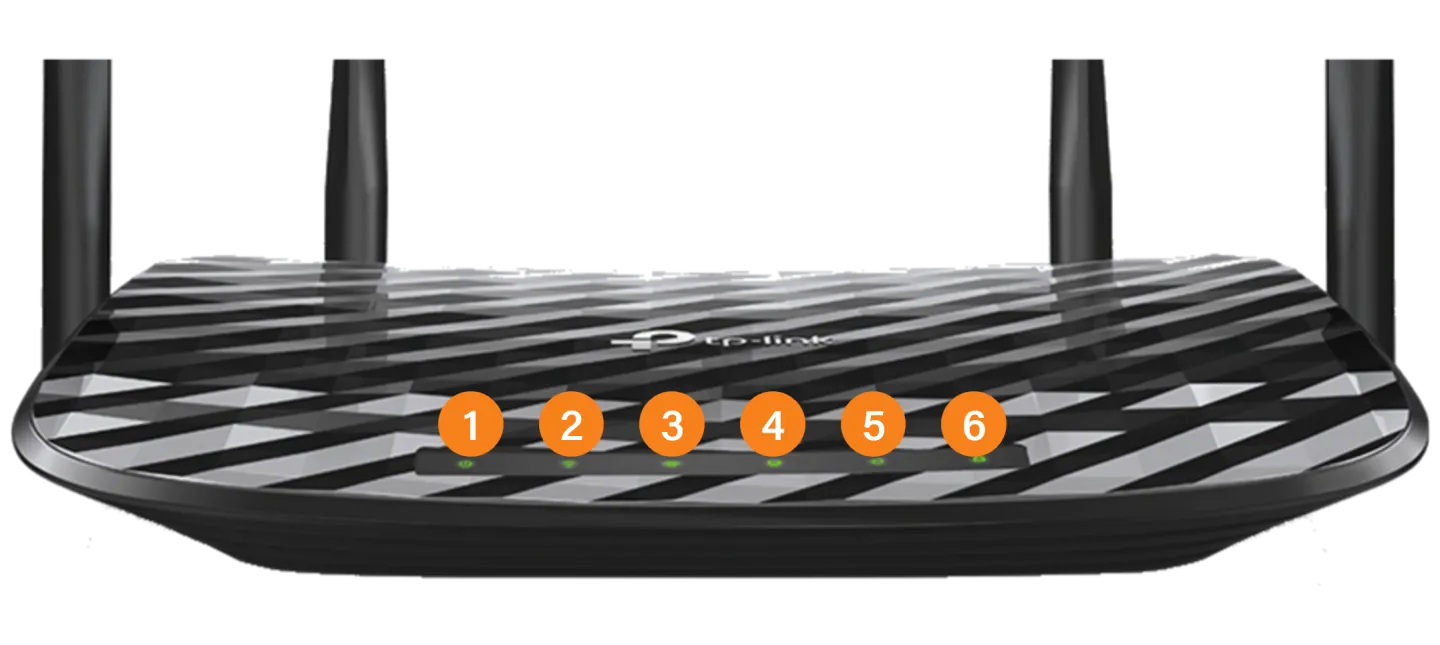
Front Panel Lights
Familiarise yourself with the lights on the front panel.
You should see the following:
- Power
- 2.4Ghz wifi
- 5Ghz wifi
- Ethernet LAN
- Internet PPPoE
- WPS
-
Ports and Connectors
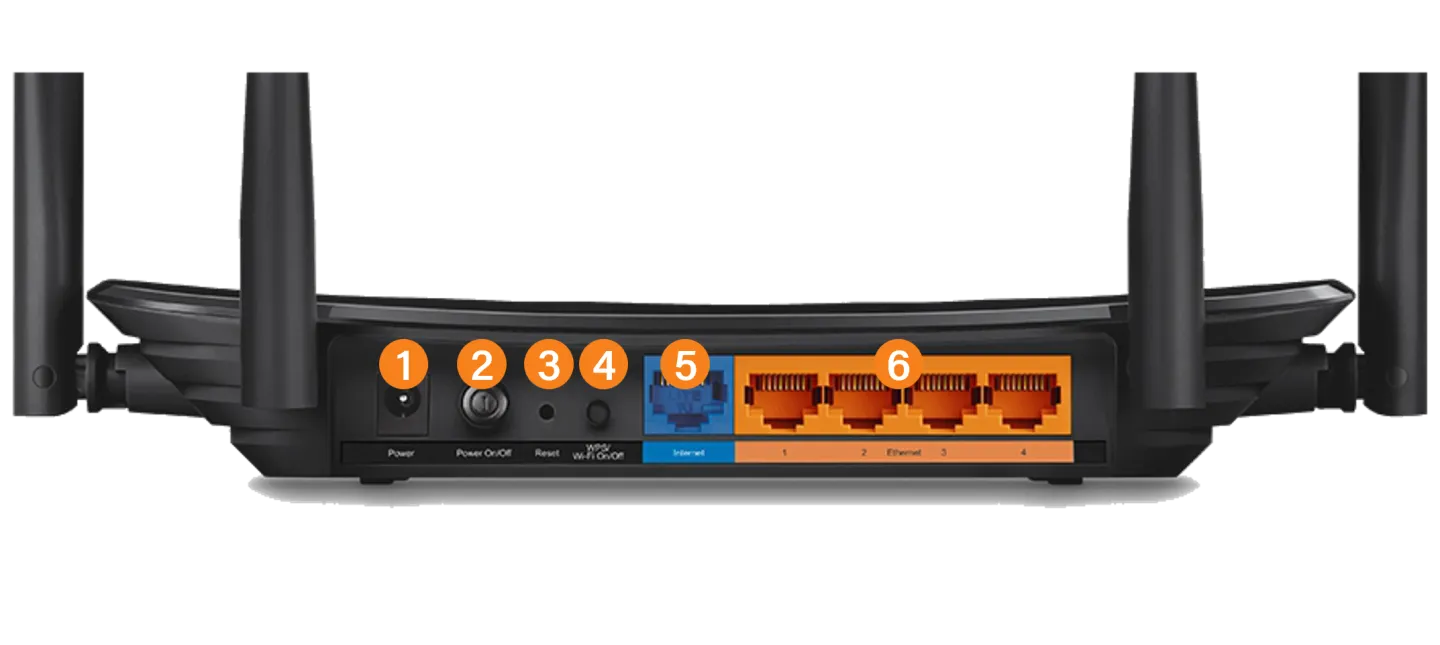
On the back panel, you should see the following :
- Power Input
- Power Button
- Factory Reset Button
- WPS Button
- WAN Port
- Lan Ports 1-4
-
Info Sticker
You will need the information on the sticker on the underside of the router. We recommend that you take a photo of the sticker with your phone before commencing with plugging in and setting up.
- Default wifi SSID (network name) and password
- Default admin username and password
- Default Wifi QR Code (you can this for a quick setup from your phone)
- Default router address
Plugging In and Connecting to your Router
Follow these steps if you need assistance plugging in and connecting to your new router:
-
Plugging in the Router
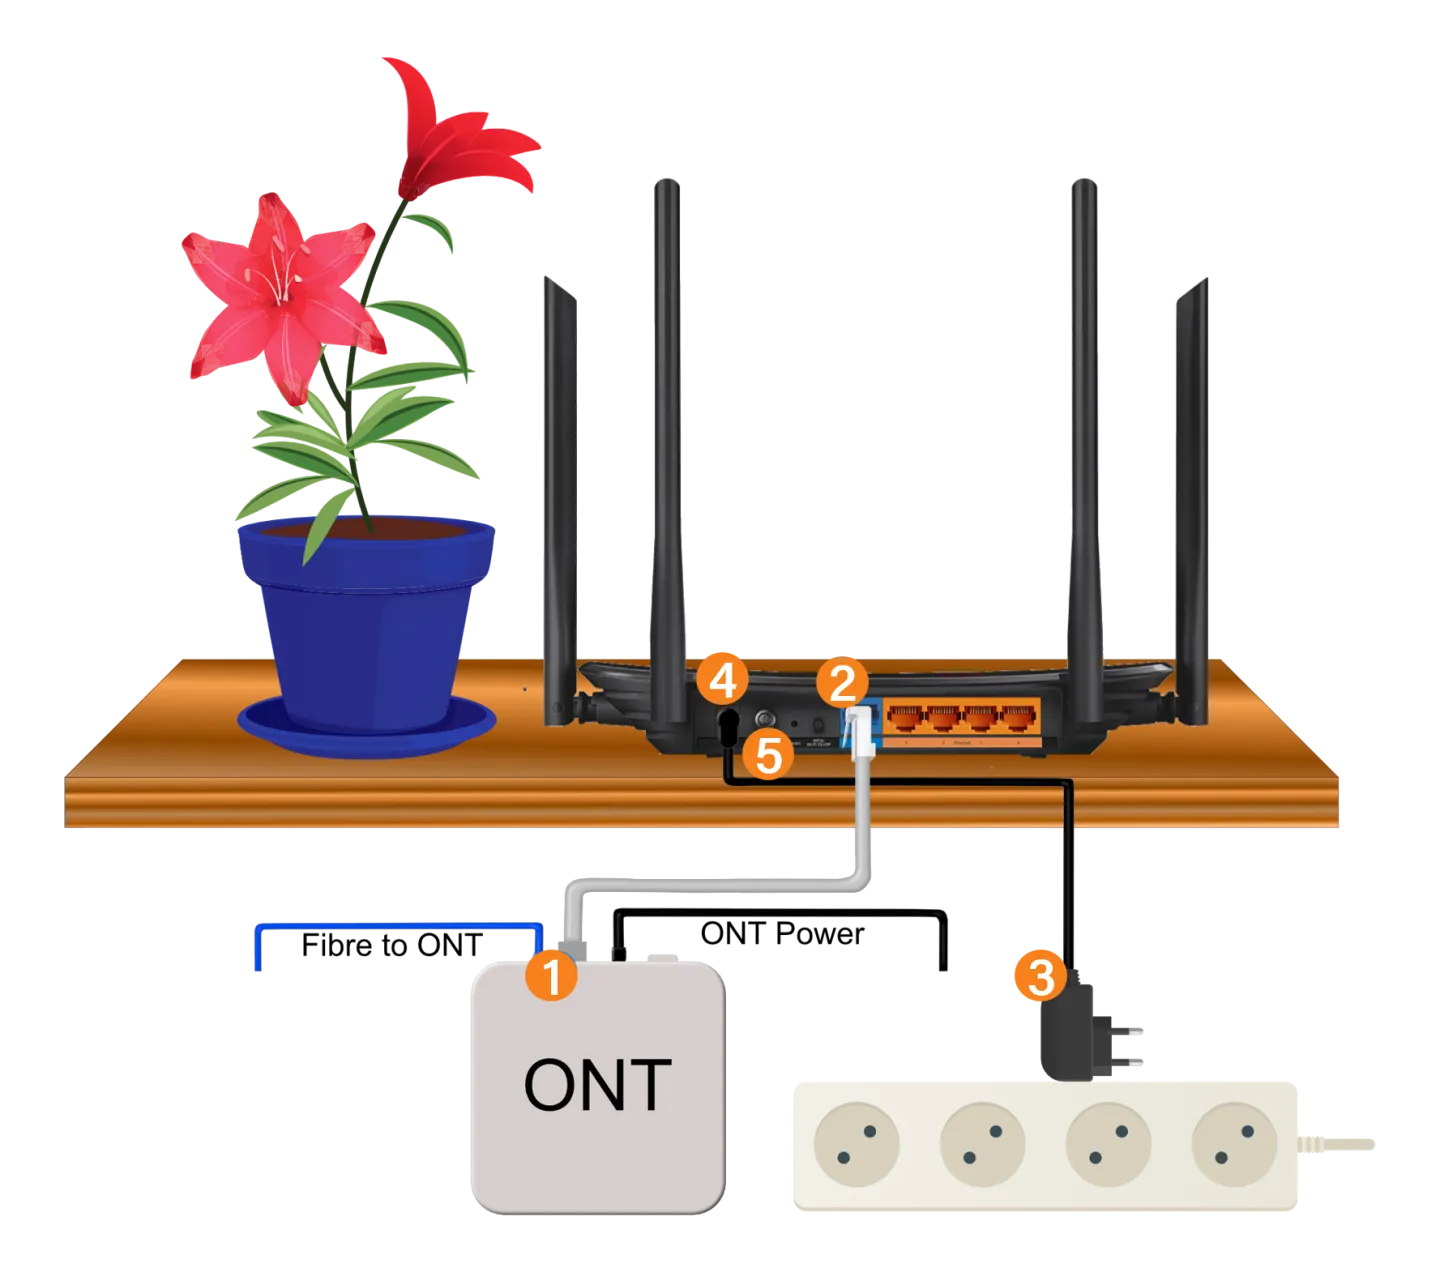
Now that you’re familiar with your router lets connect it to your fibre ONT and the power:
Using the ethernet cable provided, connect the LAN port on the fibre ONT device (1) to the blue port labelled WAN on the back of the router (2)
Plug the routers’ power supply cable into the wall power supply (3) and into the small round power socket on the back of the router (4).
Switch the power on at the wall socket and then press the Power On/Off button (5) on the router.
-
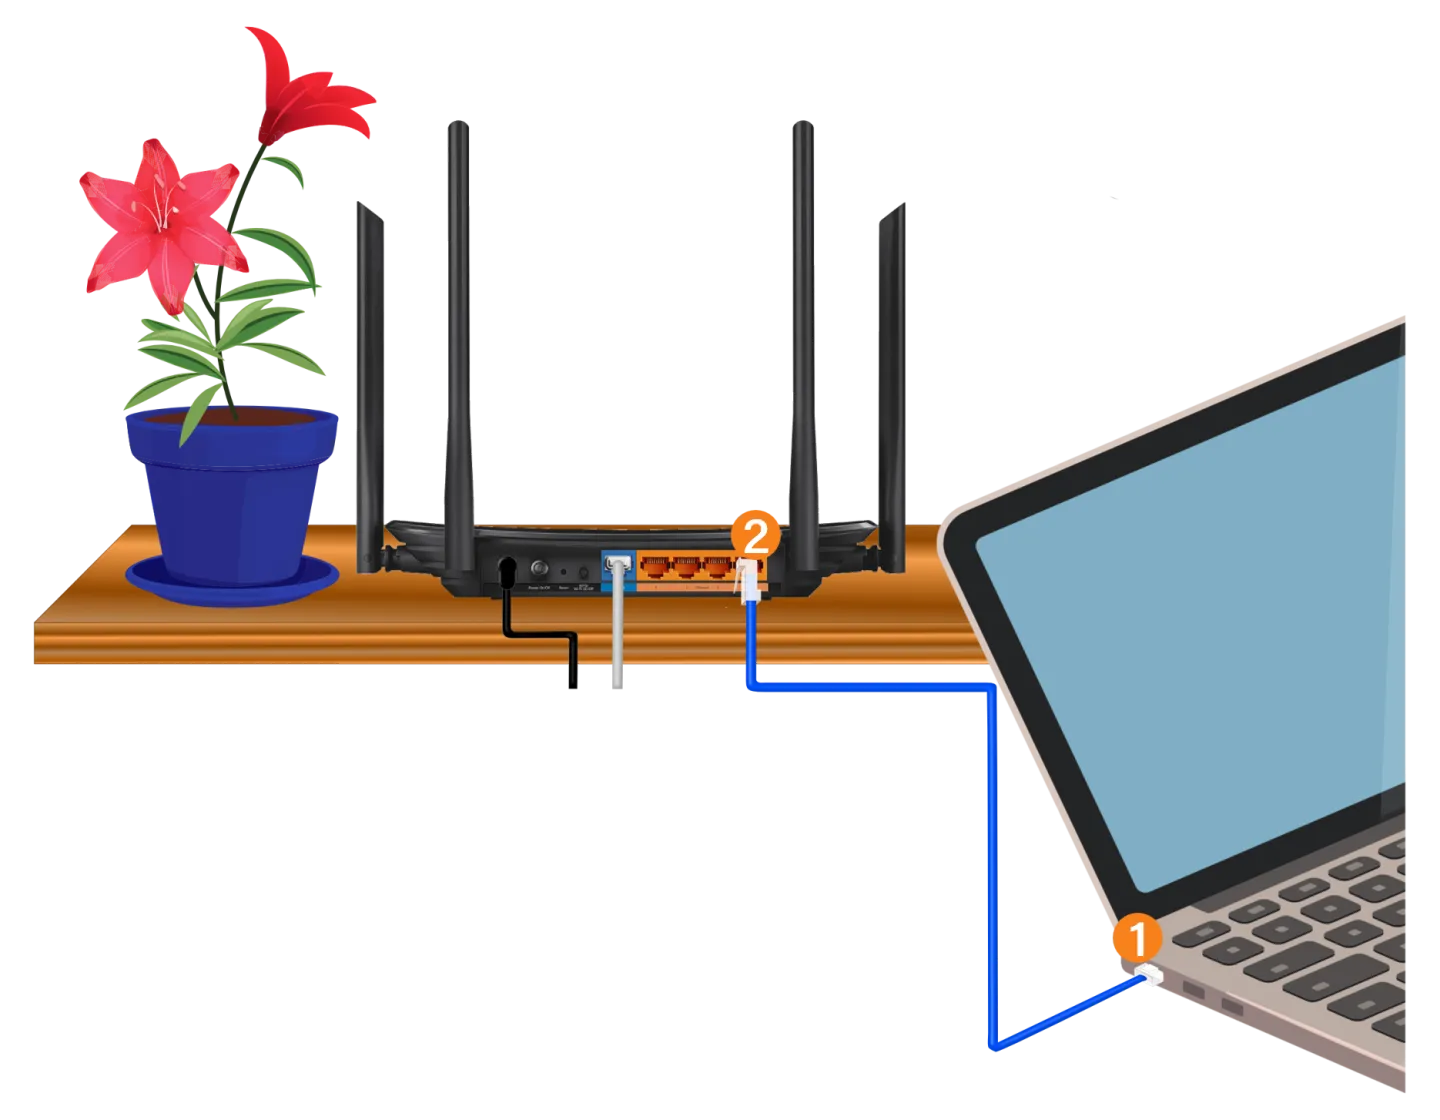
Connecting via ethernet
If you have an devices connecting with an ethernet cable, or if you’re plugging in your laptop to complete the quick setup you can connect them now.
Plug one end of the Ethernet cable into the Ethernet port of your desktop or laptop (1)
Plug the other end into the yellow LAN port labelled “LAN1, 2, 3 OR 4 (2) at the back of the router
-
Connecting Via Wifi
If you do not have access to an ethernet port on your device (usually Mac users) you can simply connect to the default Wifi network.
Refer to the sticker and connect your device to the preferred wifi network using the default password
Connect to 5Ghz for faster speeds and 2.4Ghz if you’re further from the router.
Router Setup Wizard
Follow these steps for help completing the setup Wizard on your new router:
-
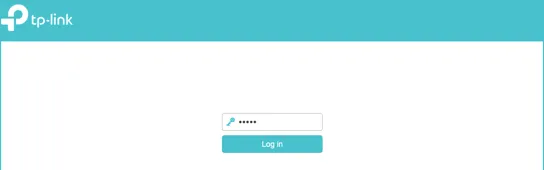
Log in to your router through your preferred Web Browser
Open your web browser e.g. Google Chrome, Firefox, Microsoft Edge etc
Type the default address in your address bar: (192.168.0.1)
Login using the password admin.
-
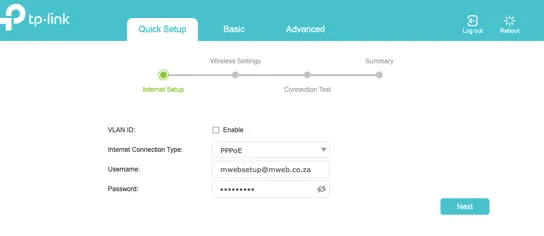
Start the setup Wizard
If this is your first time accessing the router the setup wizard should start automatically
To start the Wizard you will need to select it on the top menu.
-
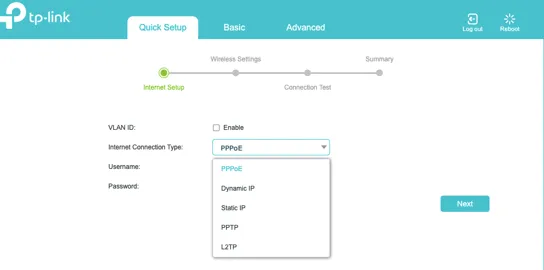
Configure the Internet Connection
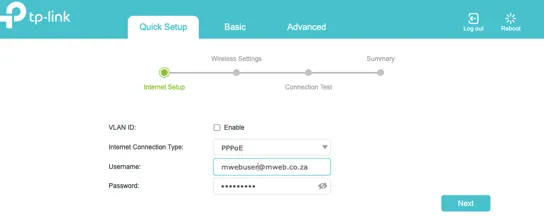
From the Internet Connection Type drop-down choose PPPoE (Ethernet WAN)
For customers on Fibre Connections that connect directly with an IP address your connection type should automatically be set to Dynamic IP.
Click Next to Continue
-
Enter the username and password provided for your Fibre product
Enter the username and password provided for your Fibre product.
If you didn't receive your Fibre product username and password, you can use your master account username and password to log in to your online Mweb Account and follow this guide to retrieve them.
Helpful tip: The TP-Link EC230-G1 supports Mweb’s updated automatic configuration system, so your username and password may already be correctly entered on the Router when you start the setup.
Leave all other options at their defaults and Click Next to Continue.
-
Setup Wifi Network
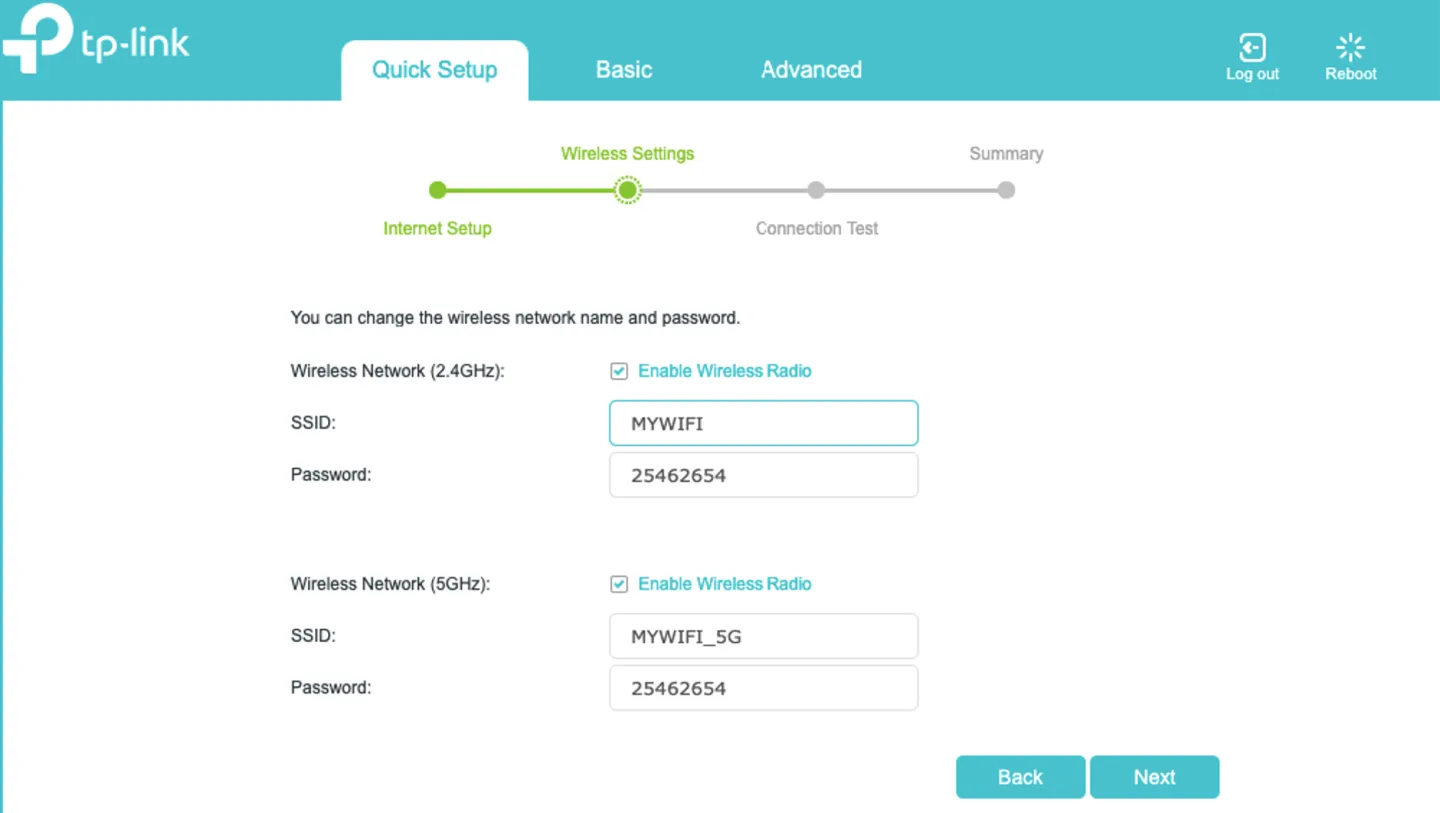
For security reasons, we would recommend that you change the WiFi Network name (the SSID) and password from those supplied with the Router. This will protect your WiFi network from others.
Change these to something that you know and will remember, e.g. WiFi network name = My House and password = combine letters, characters and numbers into a password that you will remember.
These details then become your WiFi network, which you can share with those you choose to.
-
Verify Wifi Settings
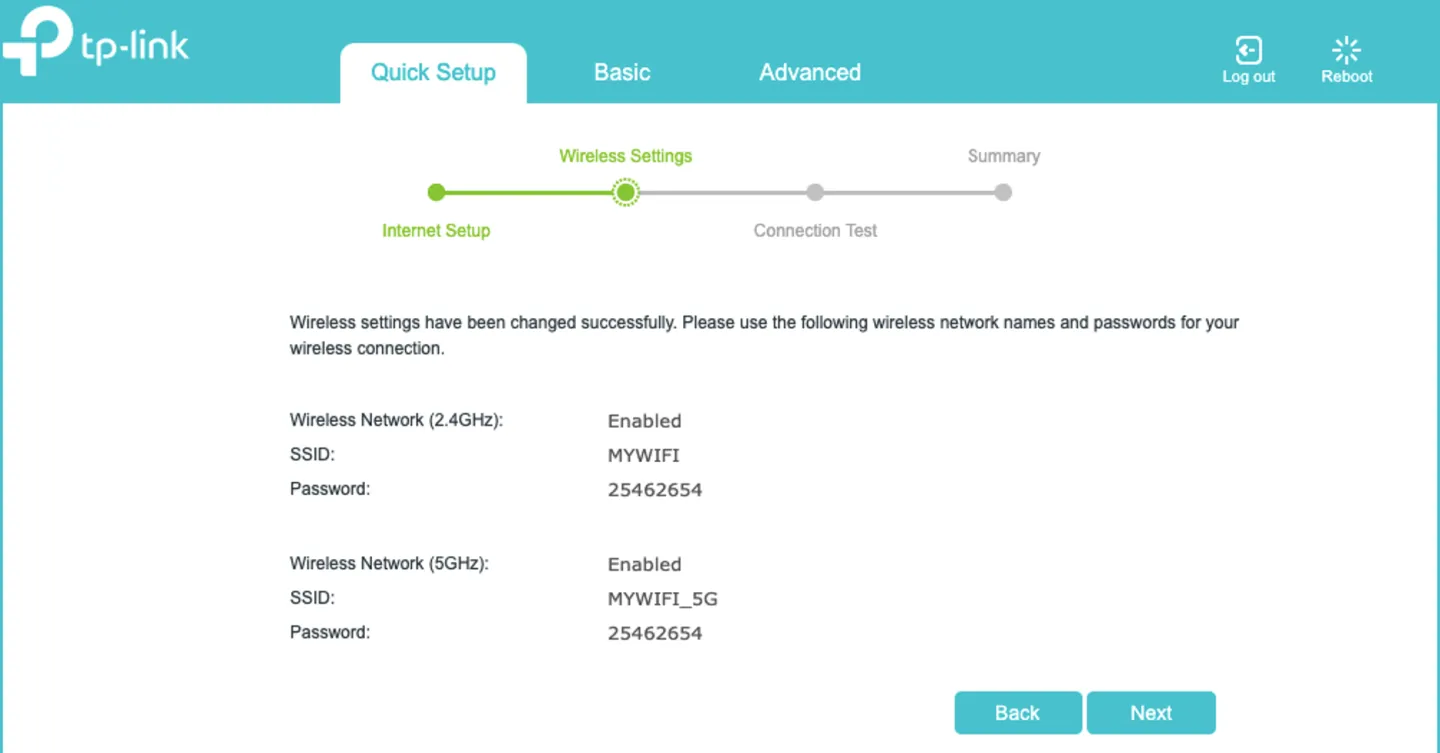
Verify that you are happy with your new WiFi settings, and remember to note your password for connecting your devices later.
Click Next to move to the next step
-
Complete the Internet Setup
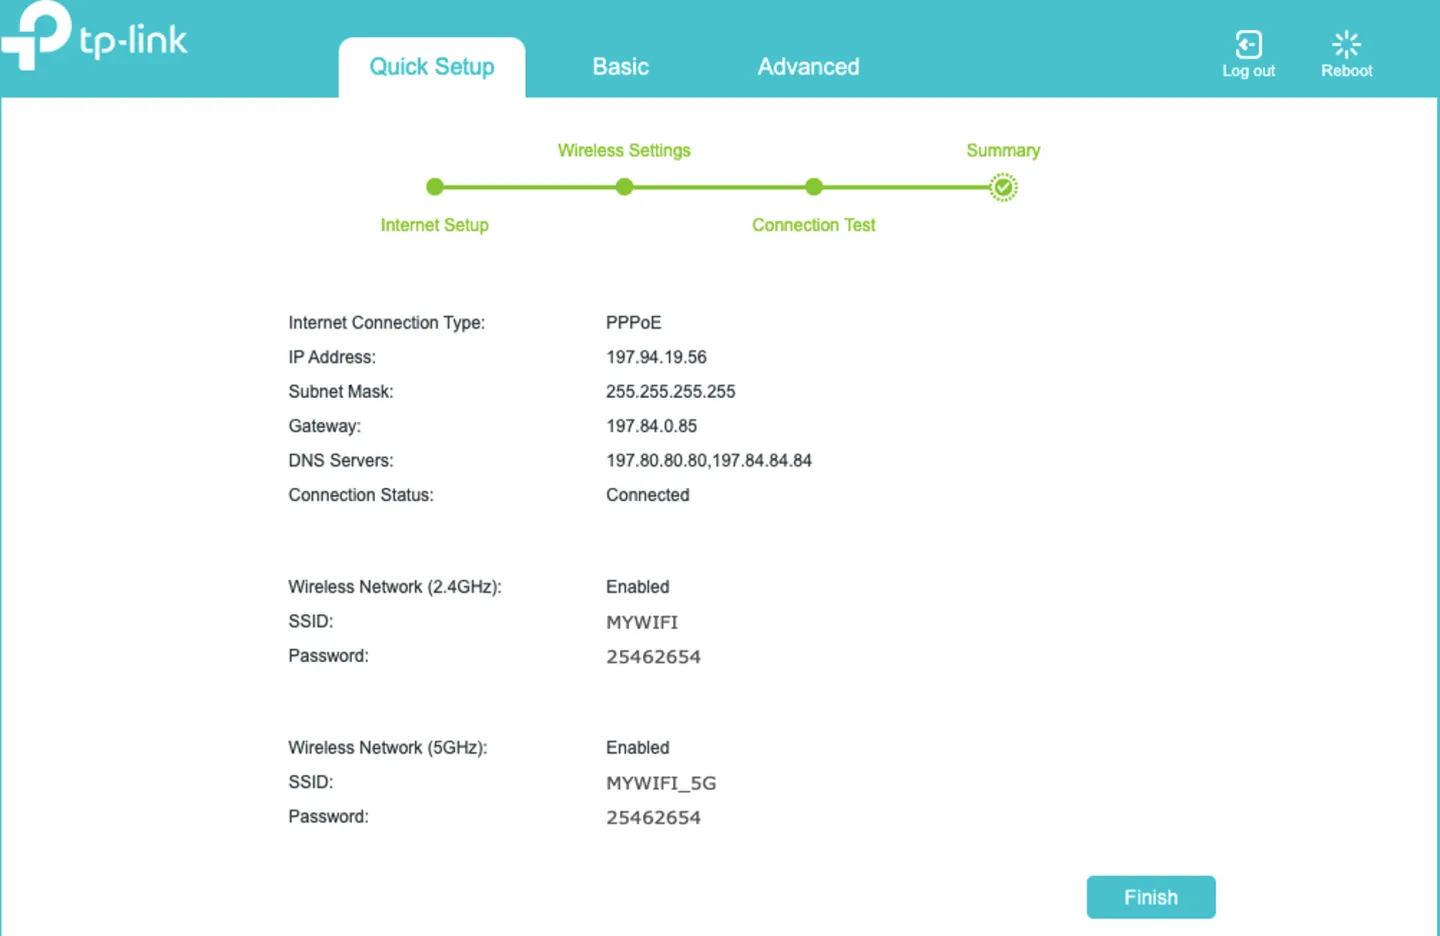
If you have entered everything correctly, the summary screen will show that you have an IP address and your status as Connected. Click on Finish to complete the wizard.
Was this article helpful?