
The Complete Guide to JetBackup 5
Everything you need to know on how to download and restore your website using JetBackup5.
This guide will help you download and restore your files and website via JetBackup5.
With JetBackup5, you have automatic backups that make it easy to restore a specific account or file within seconds.
Whether you've corrupted the config file for your WordPress, or your Web developer has just accidentally overwritten your whole online shop database, having a reliable backup in place could save your countless hours and more than a few rands and cents.
Jetbackup is a powerful tool with lots of options.
We`ve divided our guide into different sections, depending on your experience level, or which task you need to complete you can skip ahead to the correct part.
you can skip ahead to the one you need:
- Accessing Jetbackup
- Automatic backups
- Manual backups
- Download a backup
- Restore a backup
Before we Begin
We assume that you already have your Mweb Hosting Product up and running and know how to access your Mweb Online Account and cPanelIf you need a refresher on how to login to cPanel you can follow this guide.
Section 1 : Accessing JetBackup 5
Follow the Steps in the Slider below to Access Jetbackup
Sign in to cPanel
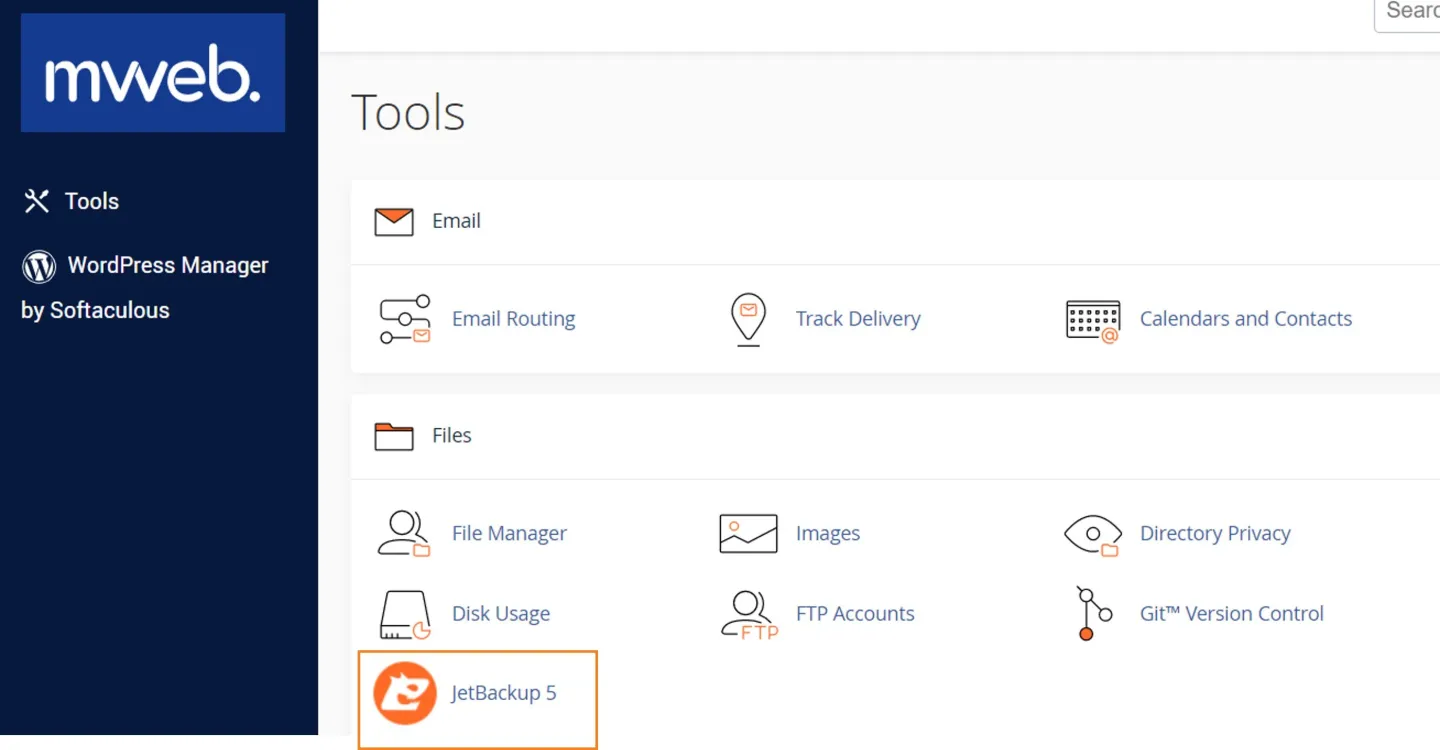
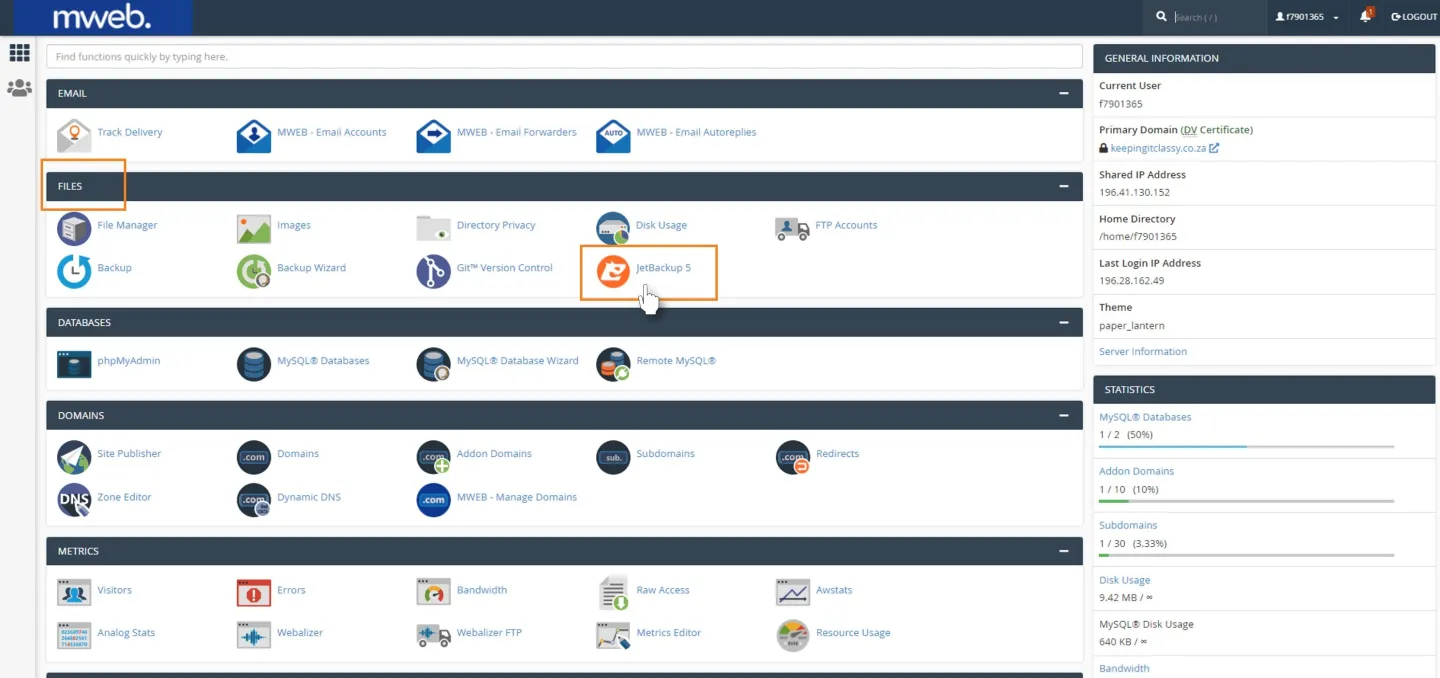
Sign into cPanel and find the Files section on the dashboard
Click on JetBackup5
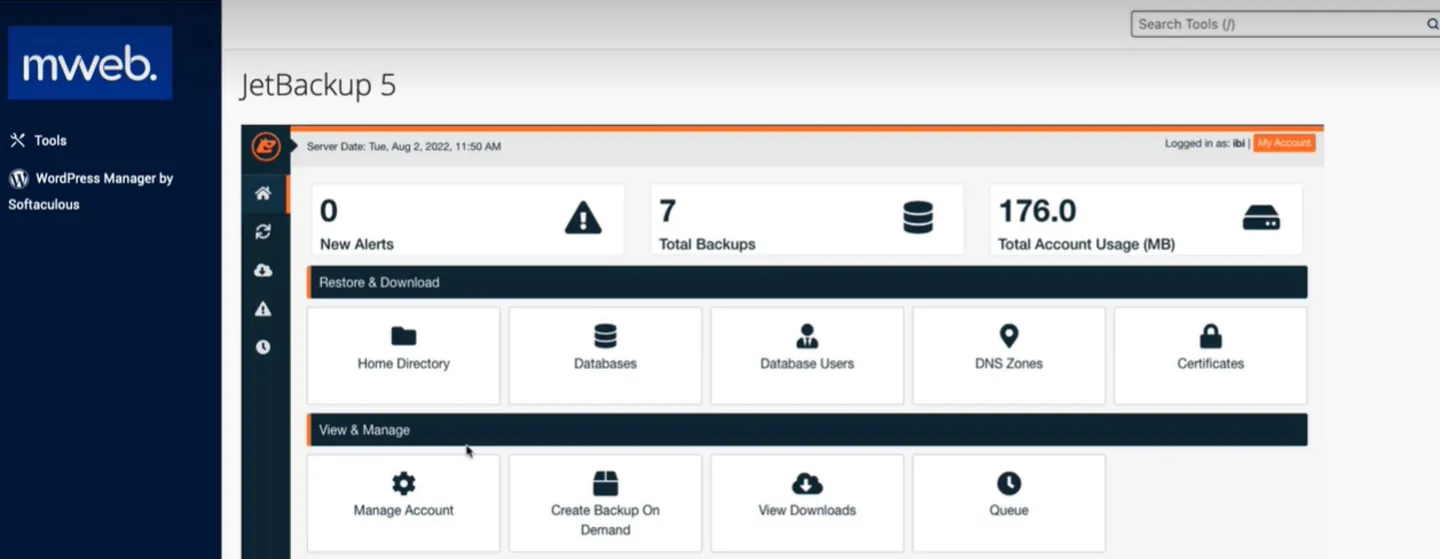
Jetbackup Dashboard
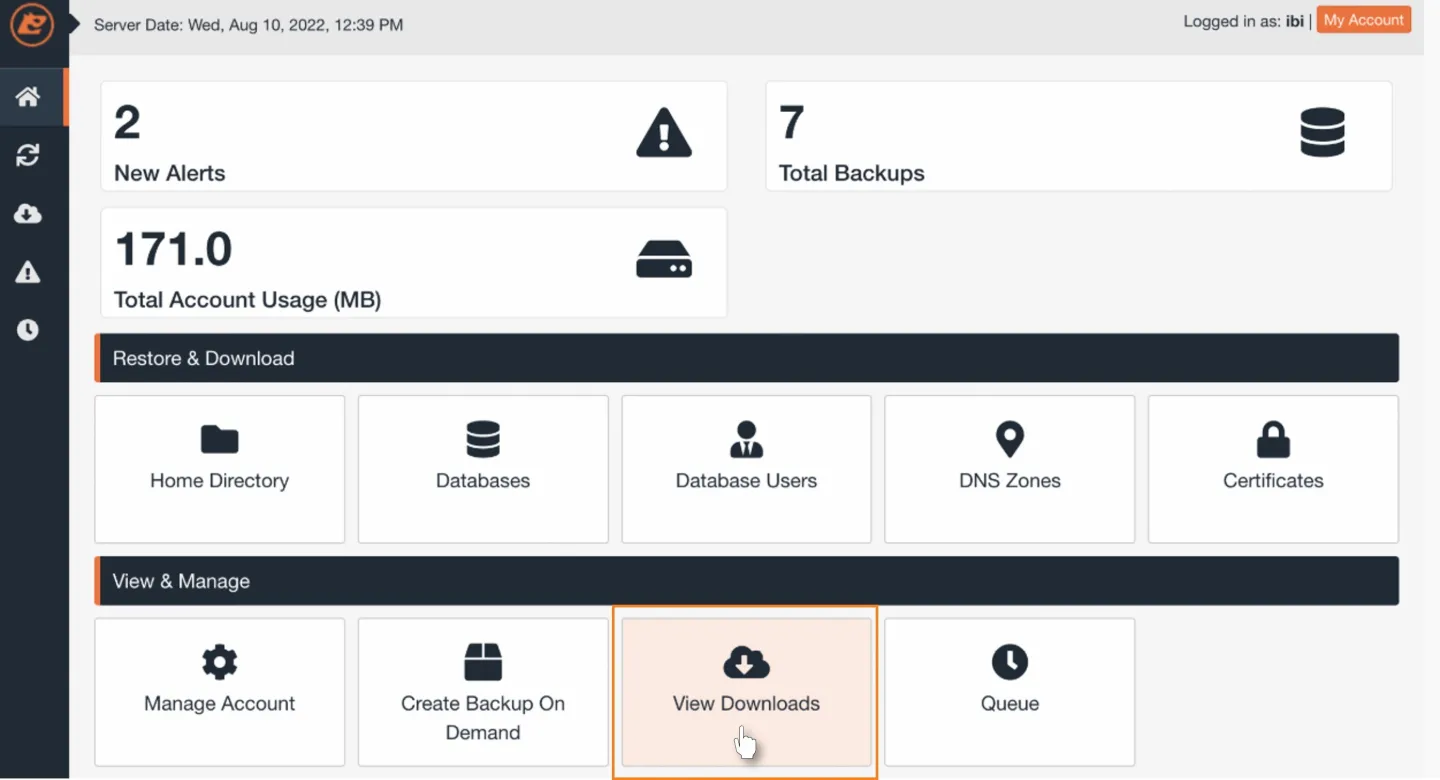
The Jetbackup Dashboard gives you an overview of your backup history and storage usage and has tasks available which include:
- Jetbackup5 includes
- Home directory - list of backups
- Databases - list of backups
- Database users - list of backups
- DNS Zone- list of backups
- Certificates - list of backups
- Manage Account - managing your account
- Create Backup on Demand - manually backup
- View Downloads - check if download is complete
- Queue - check if backup or restore is complete
Section 2 : Automatic Backups
Jetbackup runs vital incremental backups of your website automatically - follow this guide to find out more
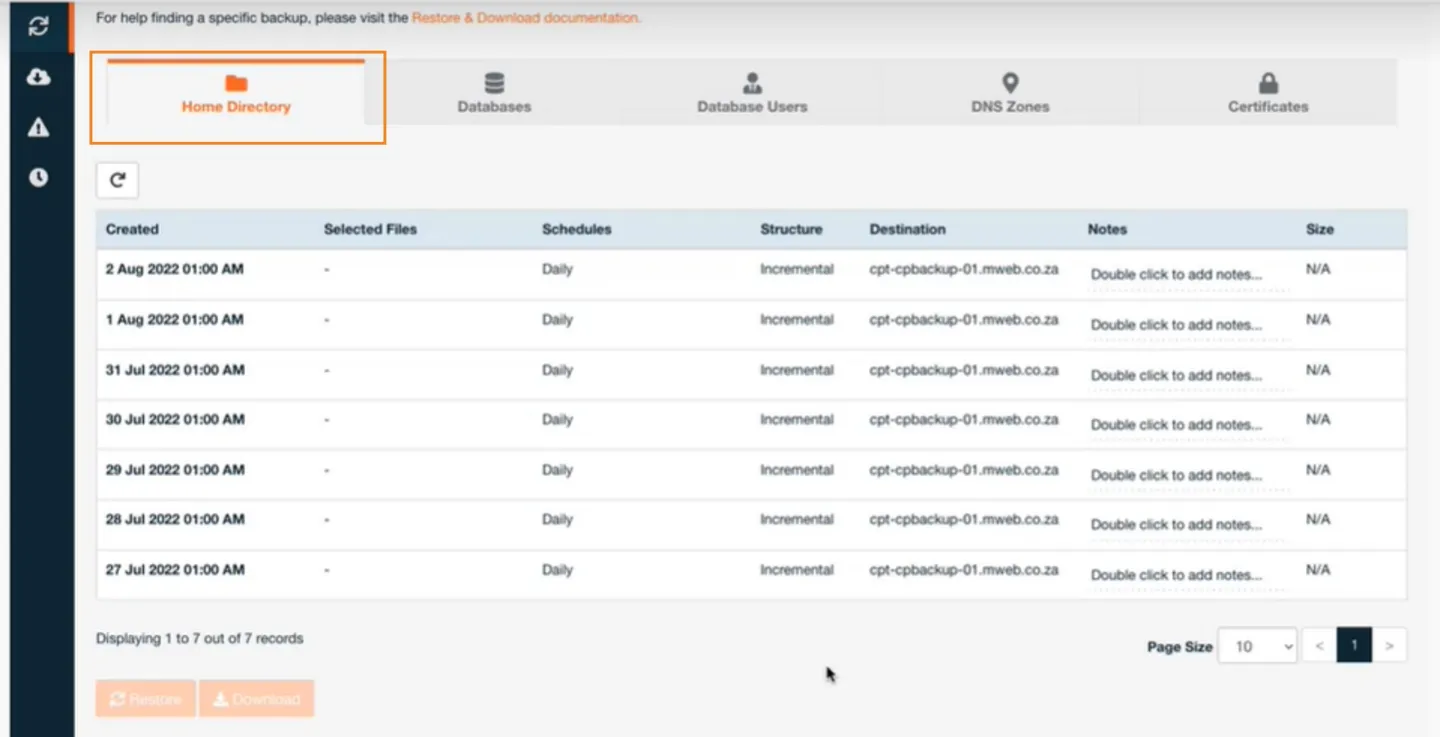
Home Directory automatic backups
JetBackup 5 will automatically back up your website daily and keep it stored for up to 7 days on the Home Directory page
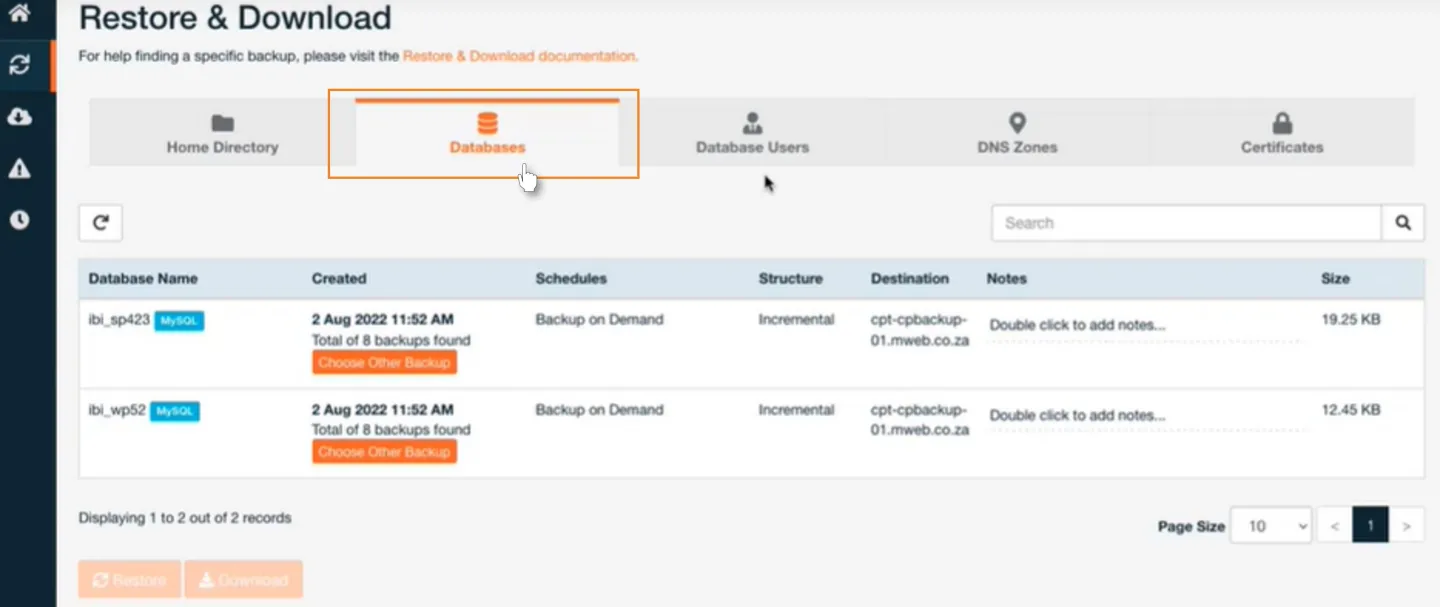
Database automatic backups
JetBackup 5 will automatically back up your databases
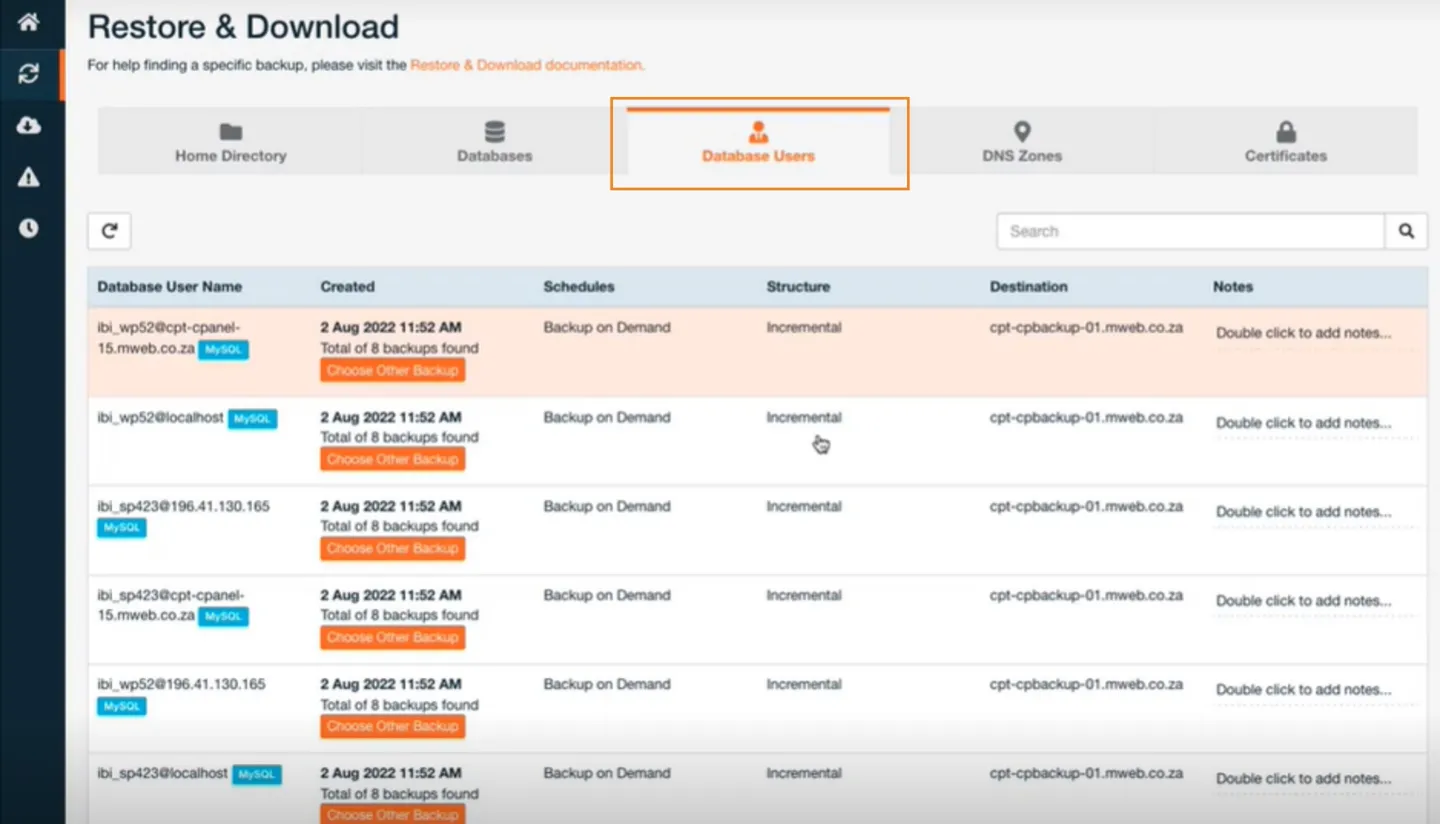
Databases users automatic backups
JetBackup 5 will automatically back up your databases users
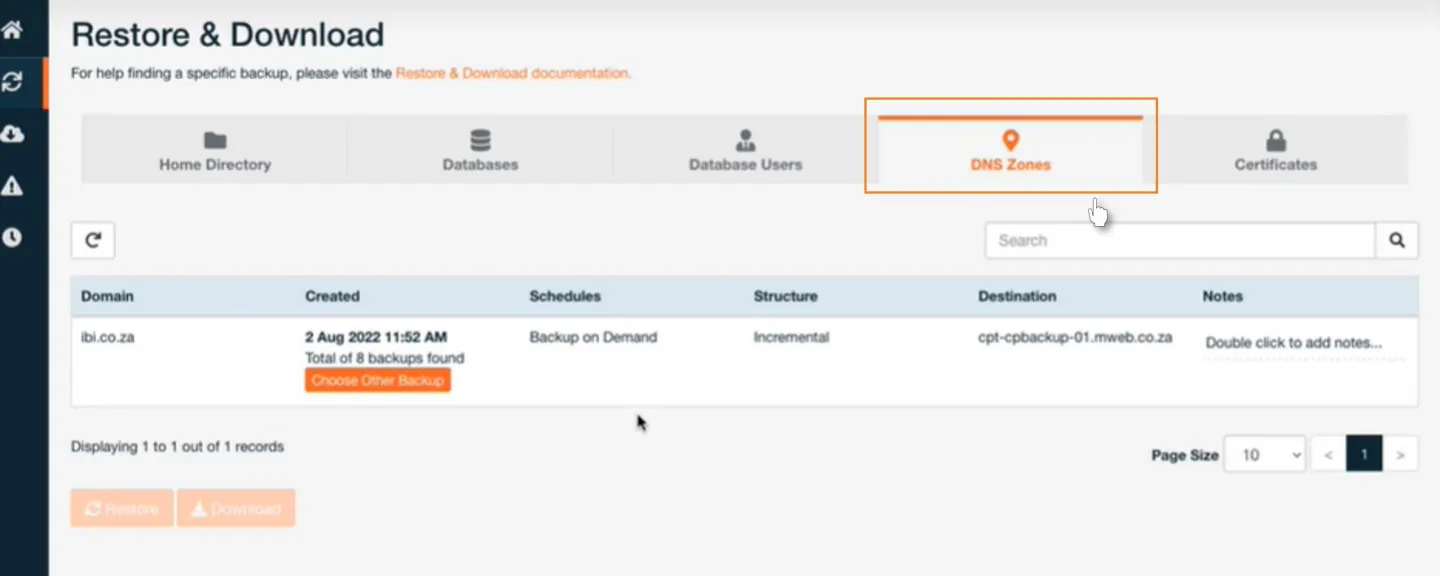
DNS Zone automatic backups
JetBackup 5 will automatically back up your DNS Zone files
Section 3 : Manual Backups
Follow these easy steps below to manually backup your website
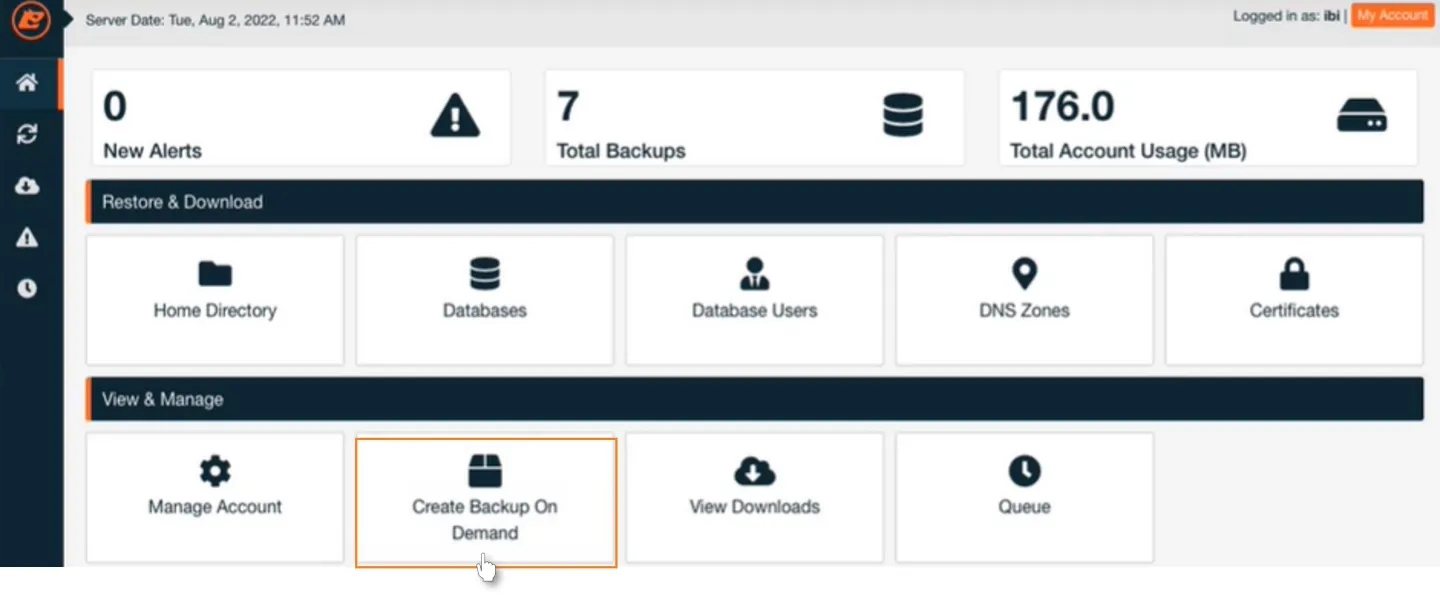
Create on Demand Backup
If you need to manually back up your website.
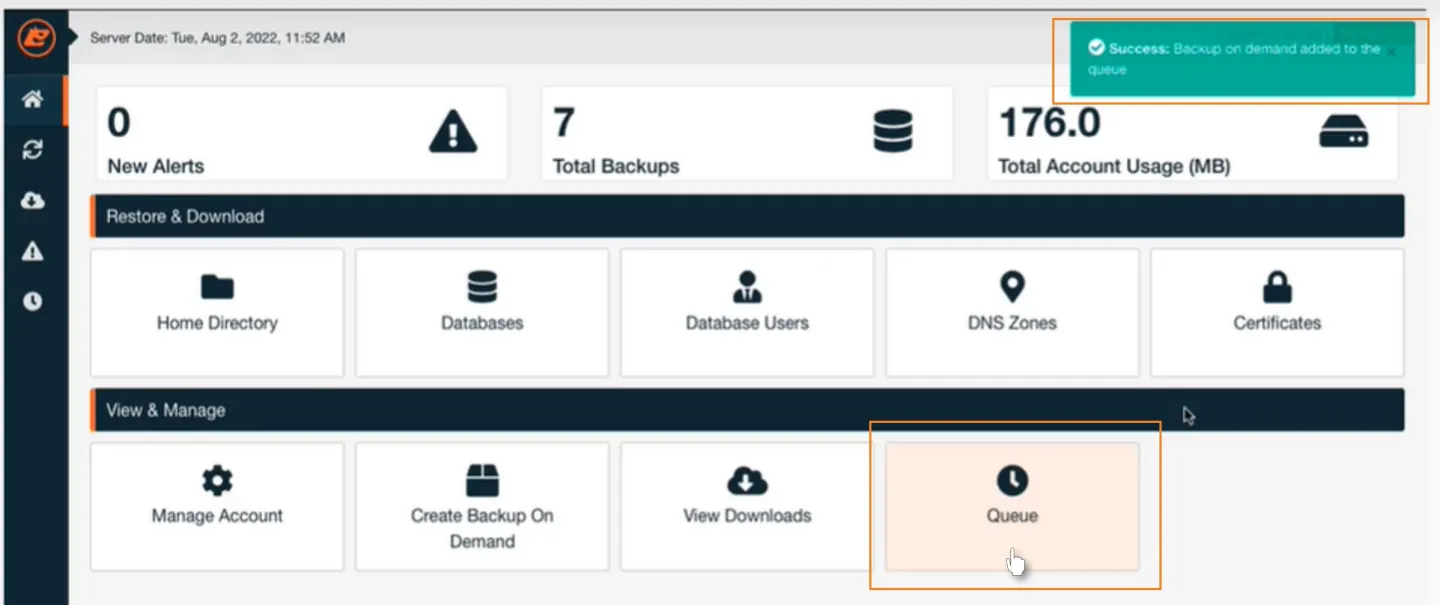
Go back to the Jetbackup dashboard and click on Create Backup On Demand
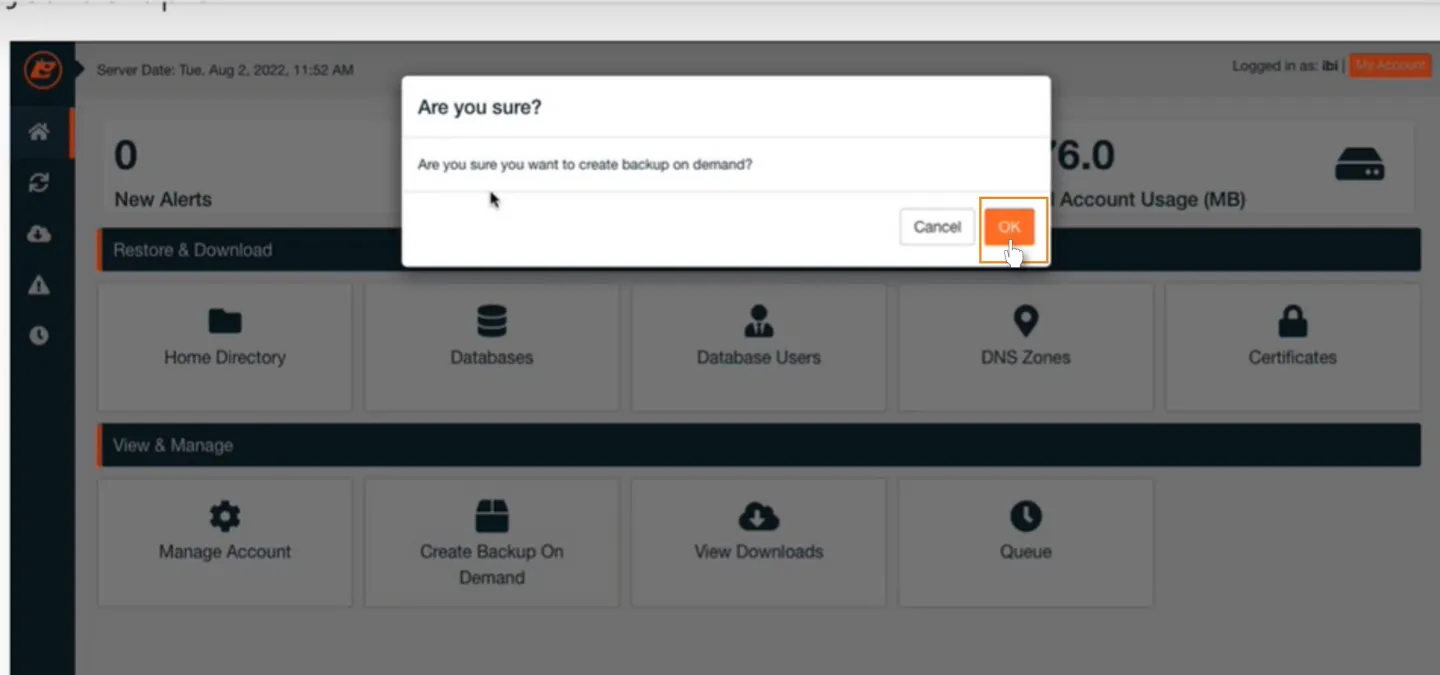
Confirm Selection
Click OK to confirm that you wish to create a new backup
Backup successfully added to Queue
After you click on Ok you should see a teal banner in the top right corner indicating that your new backup task has been successfully queued
Backup queue
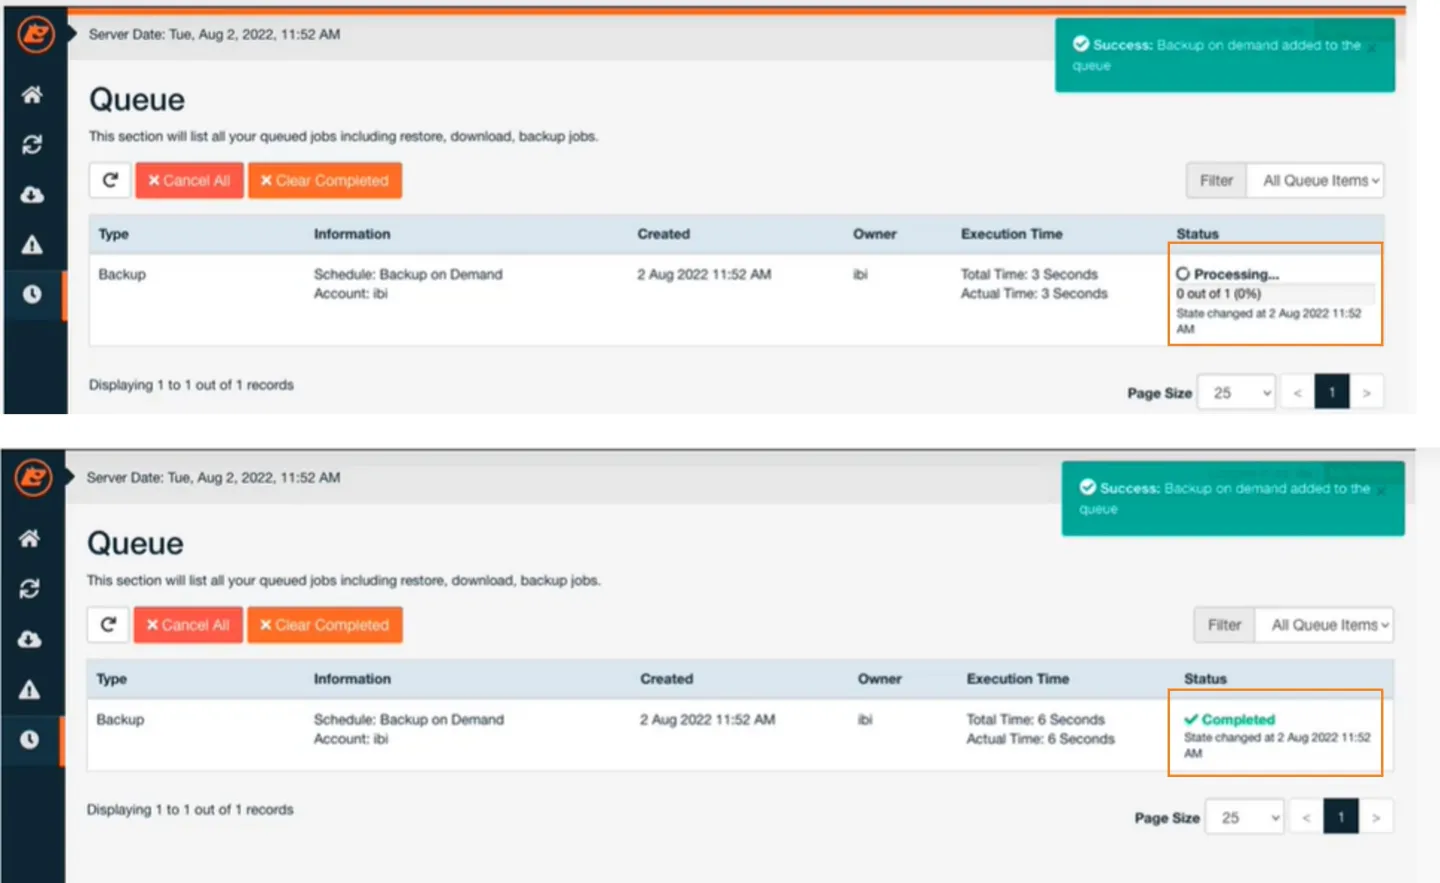
You can see the progress and completion state of your Backups in the Queue section
Section 4 : Download a Backup
Follow these easy steps below on how to download a website backup
Choosing the file
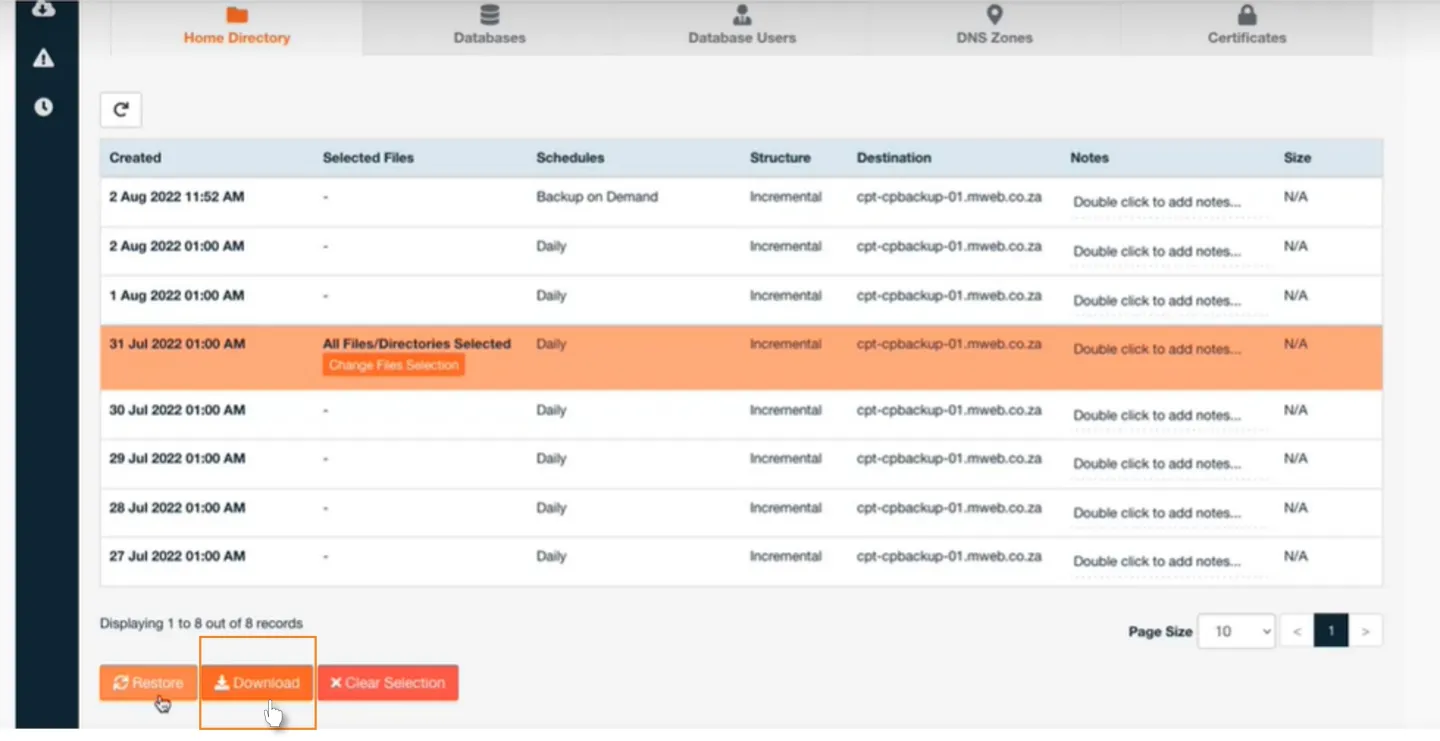
Go back to home directory page
Click on the file you want to download and click Download
(Note that this would also work if you where to download another type of backup, such as a database.)
Confirm the download
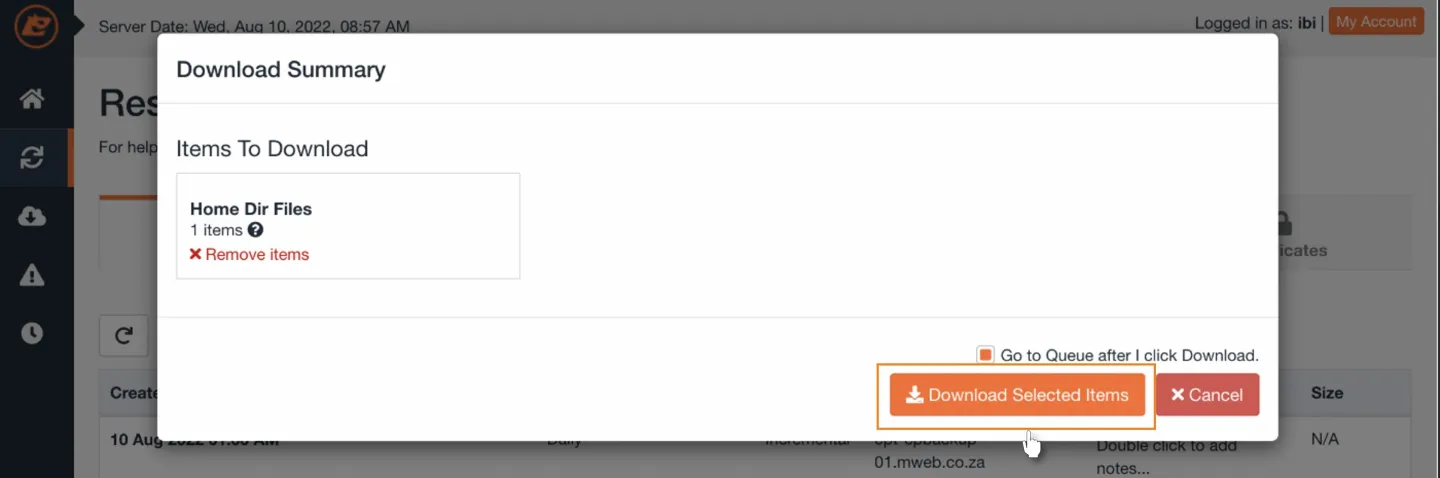
Click on Download Selected Items
Download complete
To see your completed downloads in the dashboard click on View Downloads
Save the download
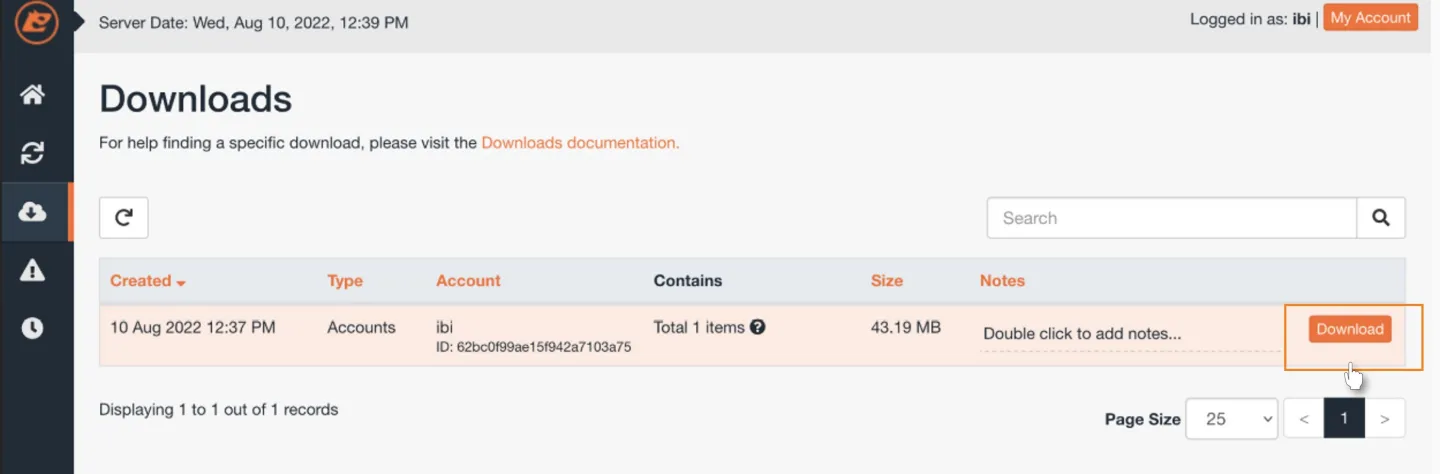
In the View Downloads section click on the Download button next to the corresponding file to download it to your PC
Saving the download on your PC
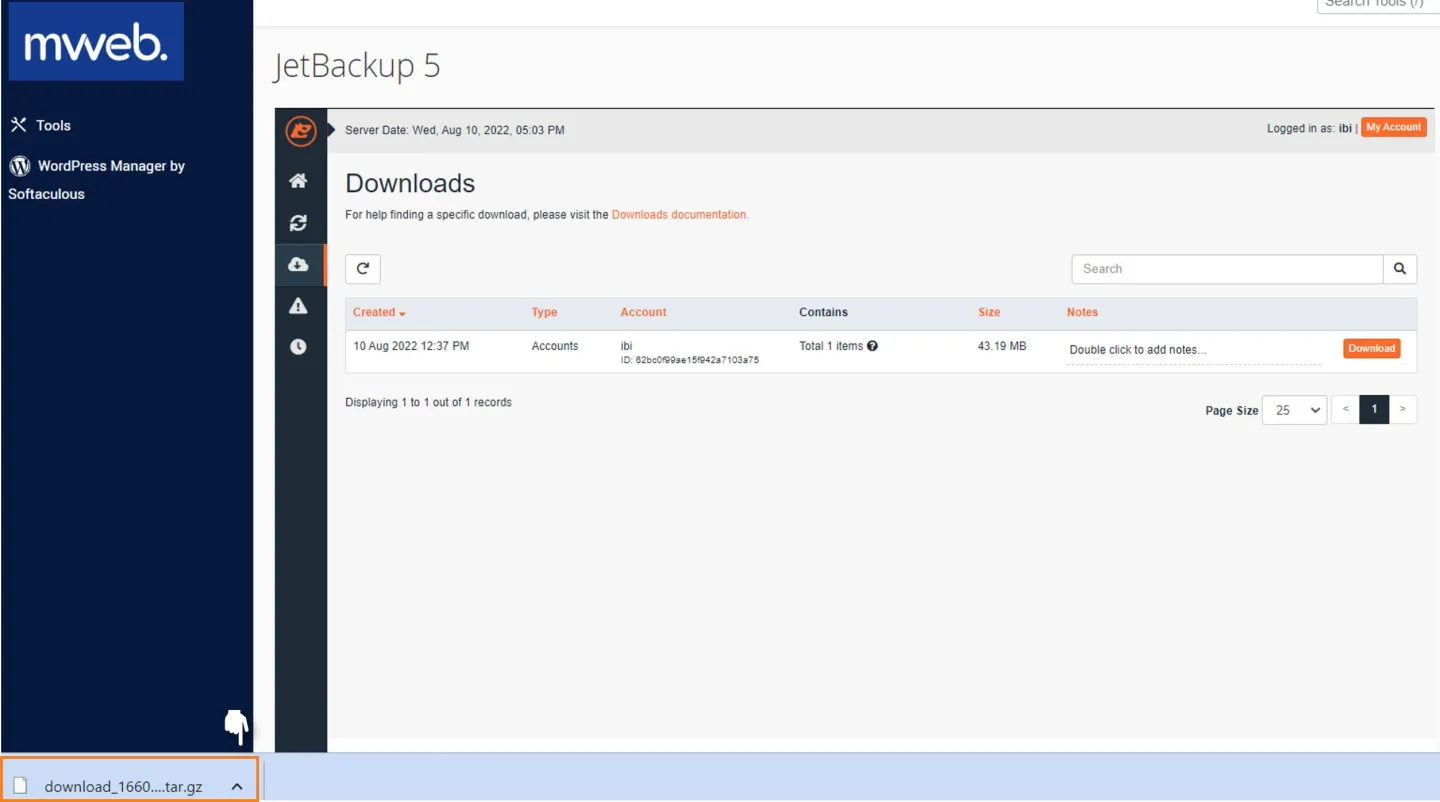
Once you have clicked download the download will be saved to your PC as a compressed file.
From there you can extract and view the files as needed.
Section 5: Restore a File
Follow these easy steps below on how to restore a file that was deleted off your cPanel using JetBackup5
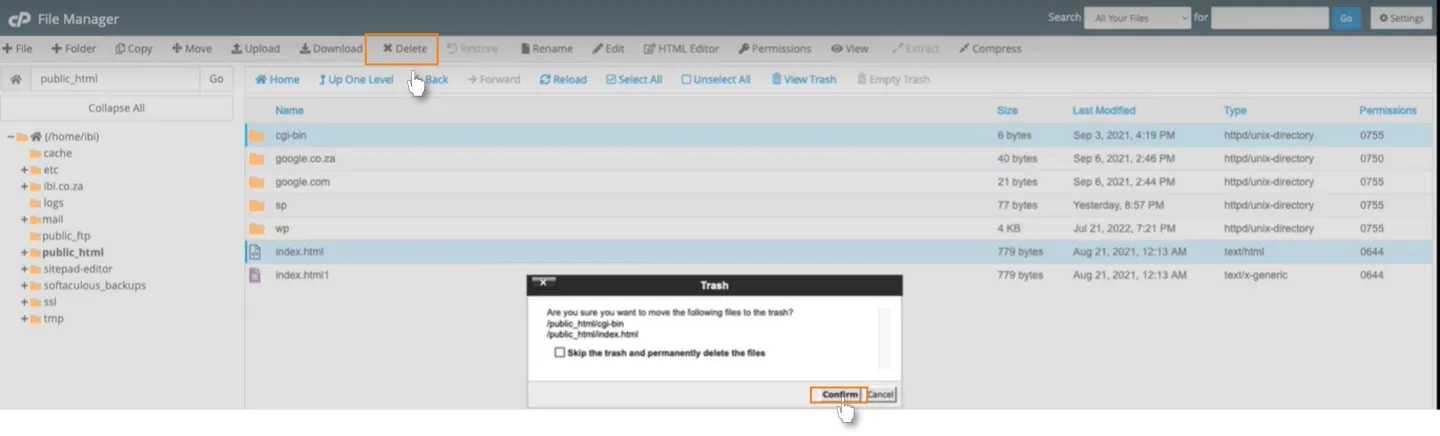
Note: A portion of the below guide demonstrates deleting a file, which is purely for illustrative purposes.
Deleting a File in cPanel
You can use the File Manager in cPanel to create move and delete files on your website, for demonstration purposes we are deleting a single file.
Launch Jetbackup
To restore your deleted file you need to access JetBackup5
Scroll down to Files and click on Jetbackup5
Restore a backup
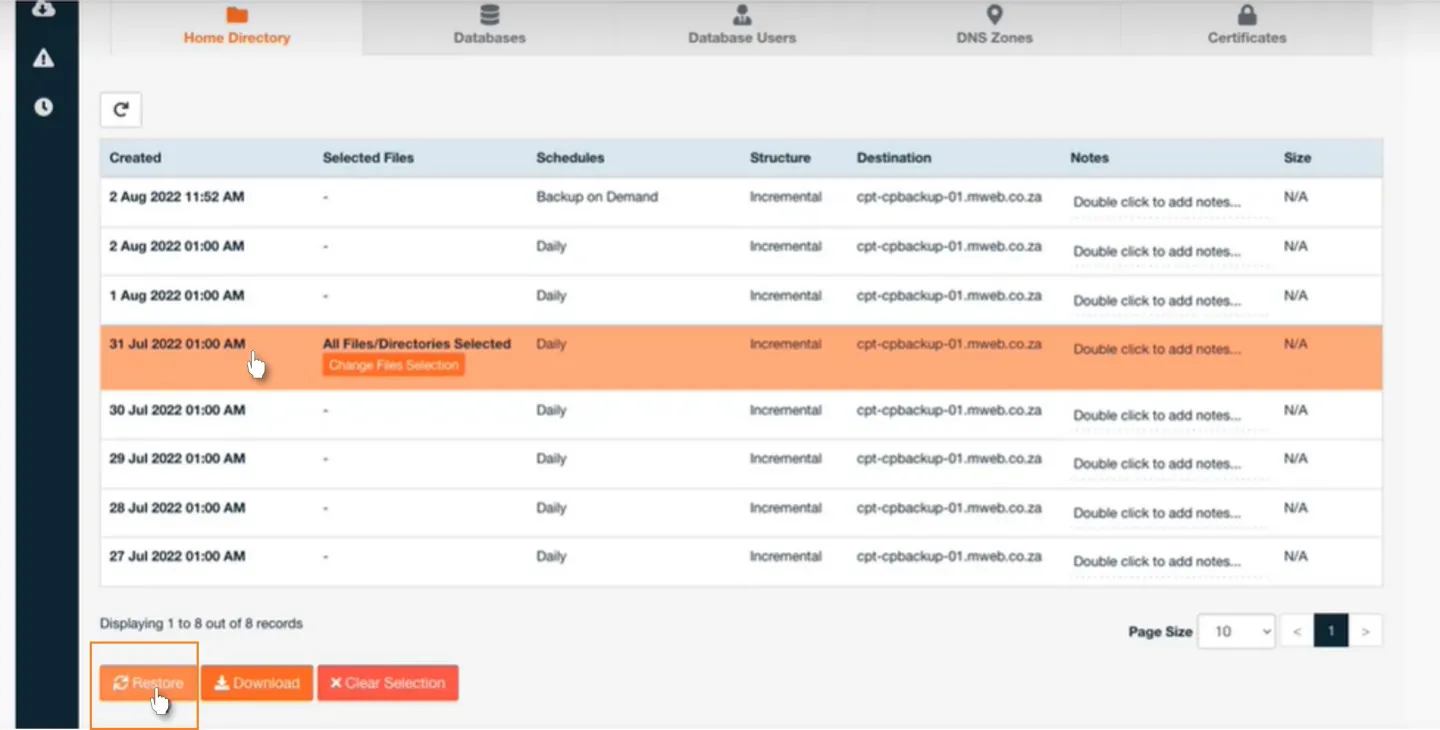
Go to the home directory, click on a back up from before the file was deleted
Now click on Restore that file will then be restored on the cPanel file management (this will restore the entire backup from that date, which you probably wouldn't normally do for a single deleted file).
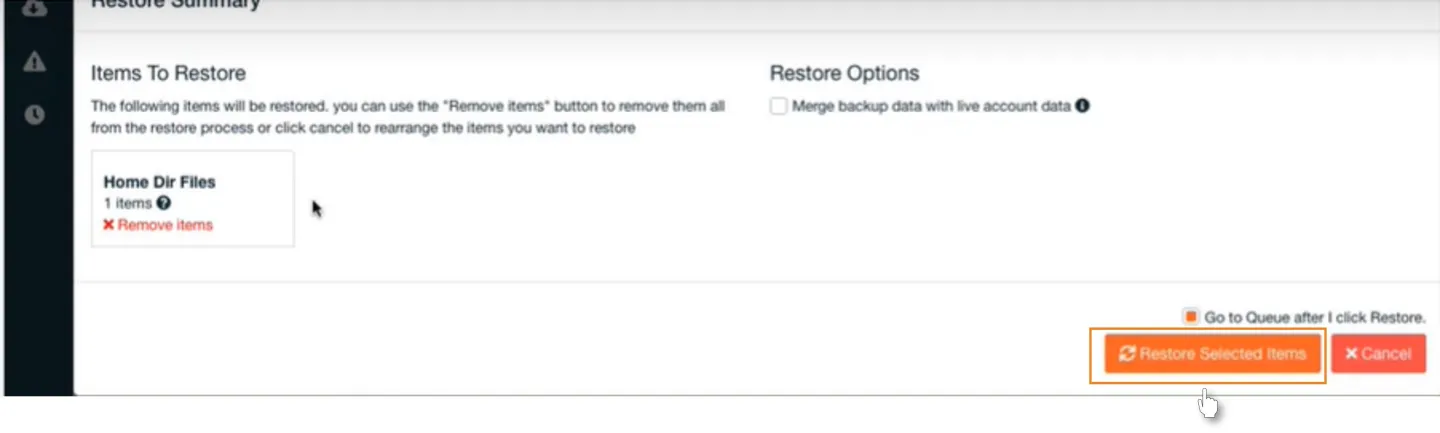
Confirm Restore Task
Click on Restore selected items
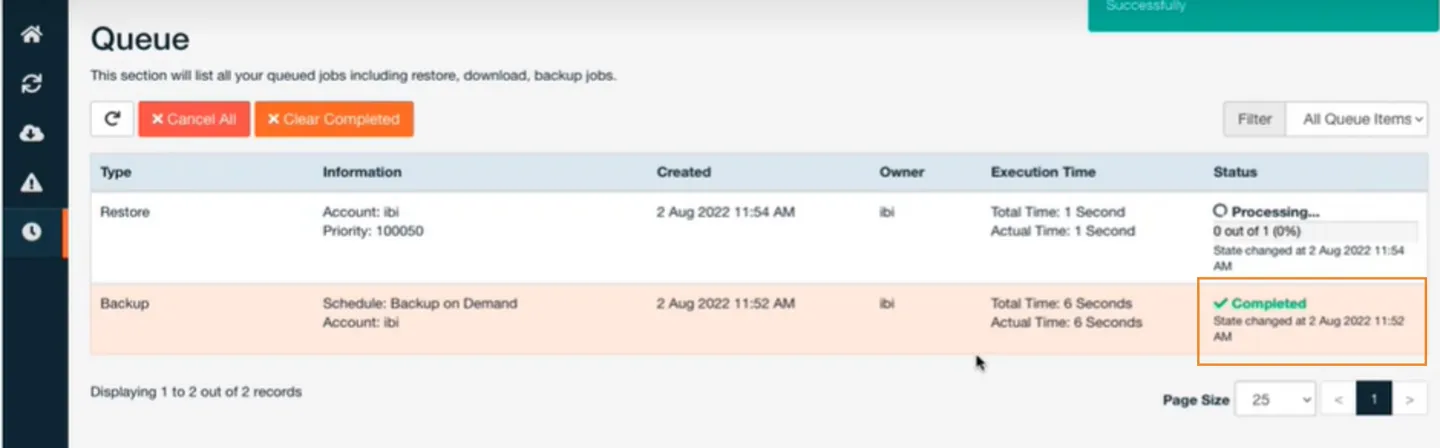
Restore Queue
Check the Queue in the Dashboard to see the progress of your Restore task
Was this article helpful?